
Dual gain at Stokksnes
in this post
An old image from my favourite place.
Dual gain. A way to take advantage of it.
Real-time mistake. Get to know your gear!
an old image from my favourite place
Looking at images that I took a couple of years ago often makes me cringe. I’ve had this hobby for a few years, and the learning curve is steeper at the beginning (or at least it seems so to me) . It hasn’t flattened out much yet, but I do notice differences. So, I wasn’t sure about using an old image for a discussion, but … it is OK. Besides, I love this place. Stokksnes peninsula with its majestic Vestrahorn mountain is, without a doubt, my favourite place in Iceland.
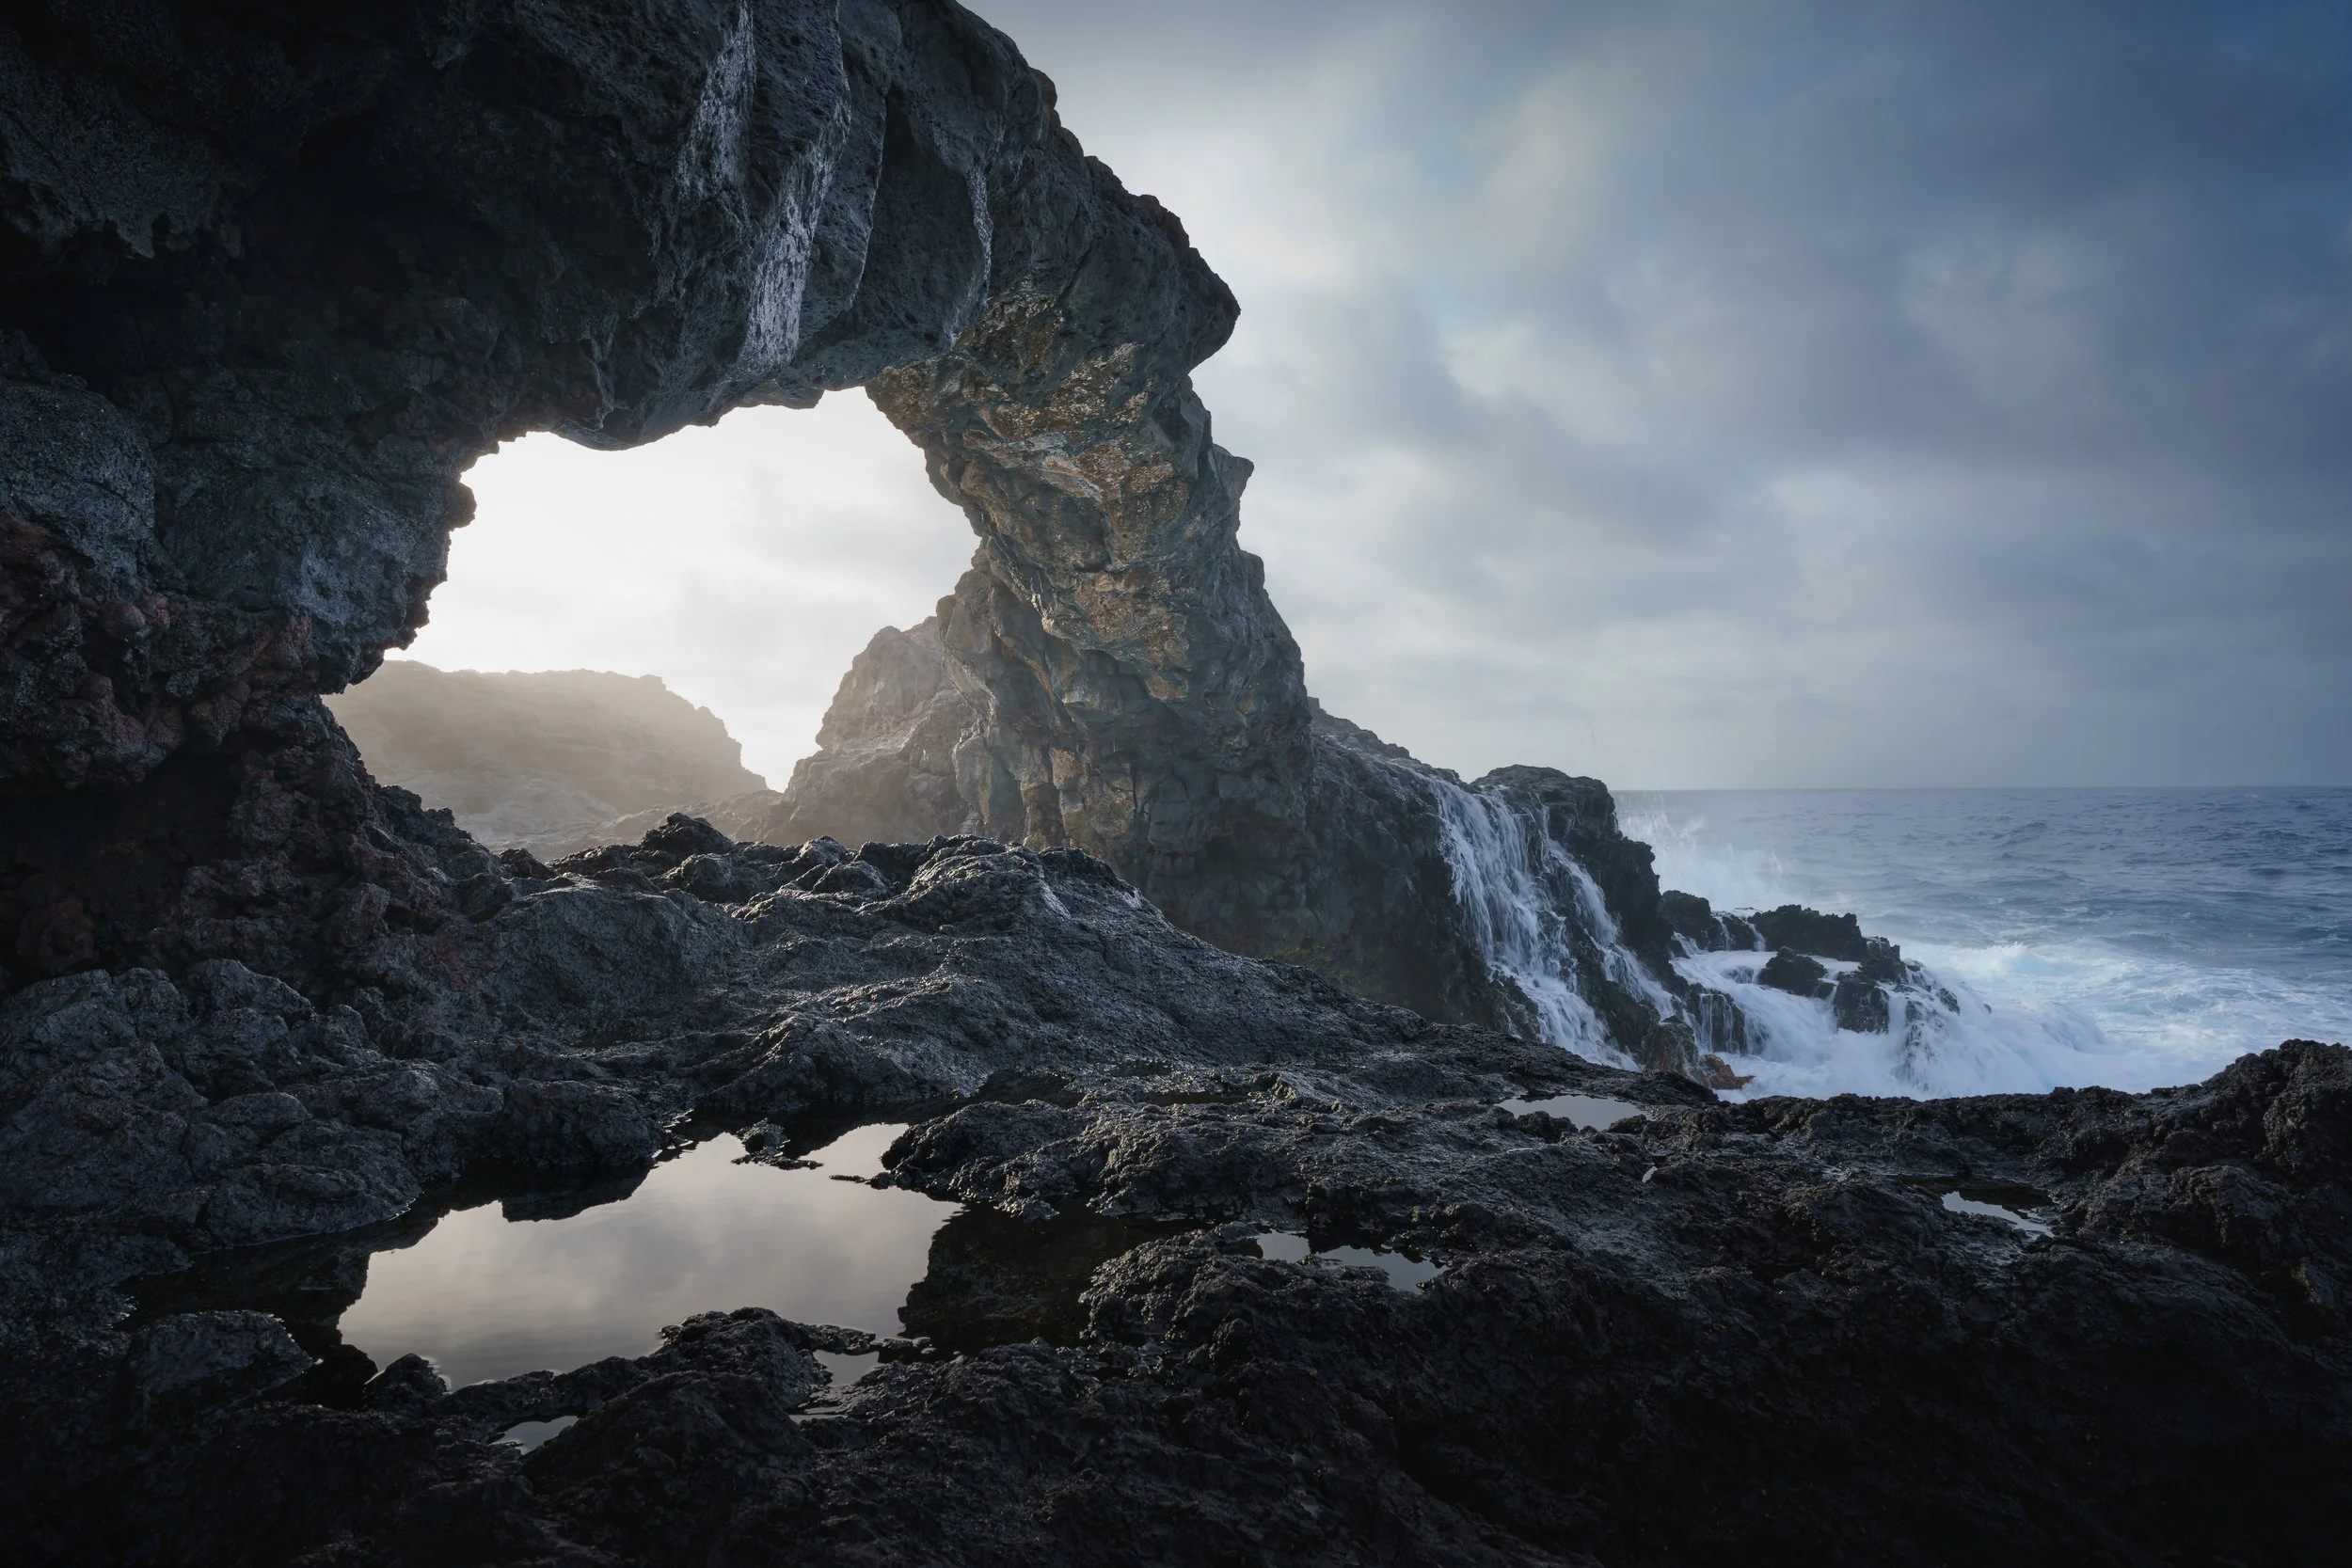
Vestrahorn, Stokksnes, Iceland. I tend to prefer color images. For me, there is a lot about the mood of the moment in the colors. But this mountain is so special, that it also looks great in BW. Color version at the end.
dual gain
Normally, the usable dynamic range of a camera decreases with the increase of the gain (or ISO). Cameras with dual gain have two different amplifying circuits for low and high ISO ranges, and reroute the amplification to the second (high gain) circuit at a predefined ISO value. The high gain circuitry has lower reading noise, giving a boost in dynamic range (DR) at the switching point.
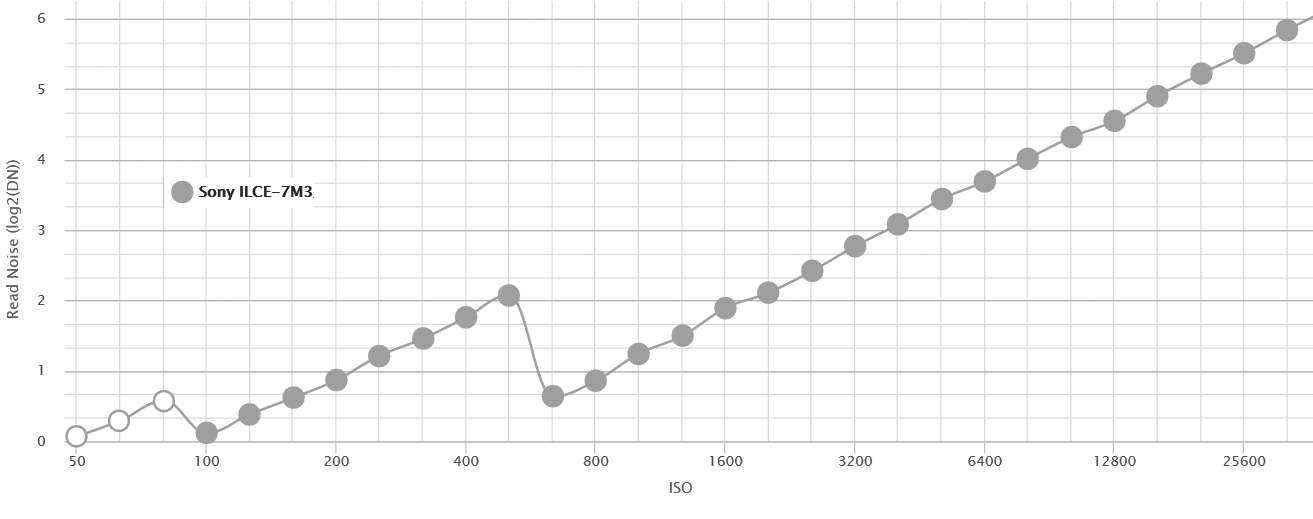
Sketch of read noise vs ISO for the A7-III.
From this graph, the usable dynamic range is estimated by subtracting the plotted read-noise value from the nominal dynamic range of the camera. ISO (gain) is needed to amplify the signal read from the sensor, before it is digitalised. It optimises image quality by redistributing the intensities of the signal over the full dynamic range of the analog to digital converter. However, this also amplifies the noise, so reducing the usable dynamic range from below. By using a circuit with lower read noise, the usable dynamic range is increased. Note the jump at ISO 640.
A situation to take advantage of the dual gain can be for instance what happened at Stokksnes, when I was making the photo above: I wanted a hand-held panorama of a high dynamic range scene.
I needed to take a panorama because the whole scene did not fit at 16 mm focal length. In that case, to facilitate post processing, all images should be taken with identical settings. For this reason, I could not use my preferred A-priority mode, and I had to set my camera to Manual mode. I chose f/13 aperture to ensure that everything was in focus. But there was a problem; I was frantic! Running like a headless chicken, taking many shots hand-held, thinking that the light would disappear. I did not want to waste time picking up my tripod, and decided to also shoot the panorama hand-held. The scene had a rather broad dynamic range, and exposure stacking from hand held images would have been too much of a gamble. So, I preferred to choose the ISO carefully. I realised that to have the ISO at base level, I would have needed a shutter speed of 1/30 sec, with a risk of motion blur. So, I set my ISO at the value where the high gain kicks in for the A7-III (ISO 640), and the shutter speed ended up being ideal at 1/200 sec, giving the histogram below. The scene was perfectly exposed. I did not push it more to the right (increasing exposure time) to avoid the risk of clipping the highlights in the snowy peaks.
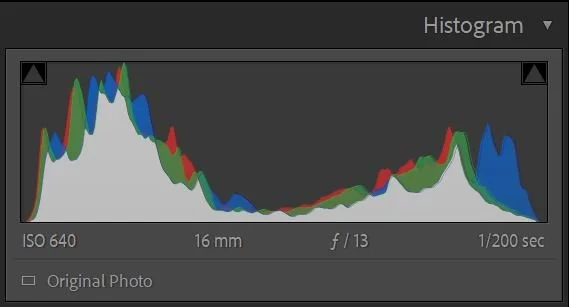
Histogram of the Vestrahorn image :-)
Of course, the best would have been to be more reasonable, and set up the tripod. With a tripod, I could have also added some ND-filter, use base ISO, and take very long exposures to make the reflection on the water even cleaner. But putting that aside, assuming that I did not have a tripod at all, the use of ISO 640 was a fine idea … or wasn’t it?
Get to know your gear!
Well … while I did manage to capture the whole dynamic range of the scene (no clipped highlights or shadows) without exposure bracketting, I was not using the A7-III!
In a previous trip to the Canaries, my A7-III got soaked in salty water while taking the image below.
Where my A7III tasted salty water
After that incident, it was giving error messages due to short circuits at the hot-shoe, which are known to affect Sony cameras. Therefore, I bought a second camera to avoid that my only one would break during the trip in Iceland.
The image of the Vestrahorn was actually taken with the new camera, an A7-IV! Somehow, I had assumed that these cameras had the same ISO behaviour, but they don’t.The A7-IV switches to high gain circuitry at ISO 400, instead of at ISO 640. My idea of using the second base ISO was good, but it was not realised. I should have used ISO 400 with an exposure time of 1/125 sec (also fine for a wide angle hand-held shot).
However, it did not make any difference in this case. There was enough dynamic range at this ISO to capture the whole scene, and it was perfectly exposed. That is what matters in this context.
Vestrahorn, Stokksnes, Iceland.
Trying to dial settings for maximum dynamic range was just mental exercise this time, but it is a good resource to keep it in mind for hand-held panoramas. Eventually, you might be shooting half of the panorama towards the sun, and an extra stop of dynamic range could make a difference. The A7-III gets a DR boost of almost two stops around ISO 640! Many modern cameras share this feature, though each model has its own boost and switching ISO value.
Thank you for reading!